Ah, split keyboards, the poster boy for ergonomic typing that was first popularized back in the 90s, thanks to the likes of Apple and IBM. While early prototypes and commercialized models came with a split layout that was confined within a single keyboard unit, nowadays, split keyboards come in actual two halves, so that you can start enjoying that comfy typing angle from the get-go.
Today, we’ll be taking a look at the ROG Falcata gaming keyboard, first revealed during COMPUTEX 2025 and now in our hands for a review.
Quick Unboxing
Let’s go through the box quickly – A chonky unit, which is befitting for a special and premium keyboard like the Falcata.
Inside, you’ll meet the keyboard in its two halves, sitting nicely in the bag. Lifting up the top layer, then you can find 2 accessory boxes at the bottom, containing the screws, an allen key, feets, a long USB cable, and a short USB interlink cable, as well as other nitbits like manuals and whatnot.
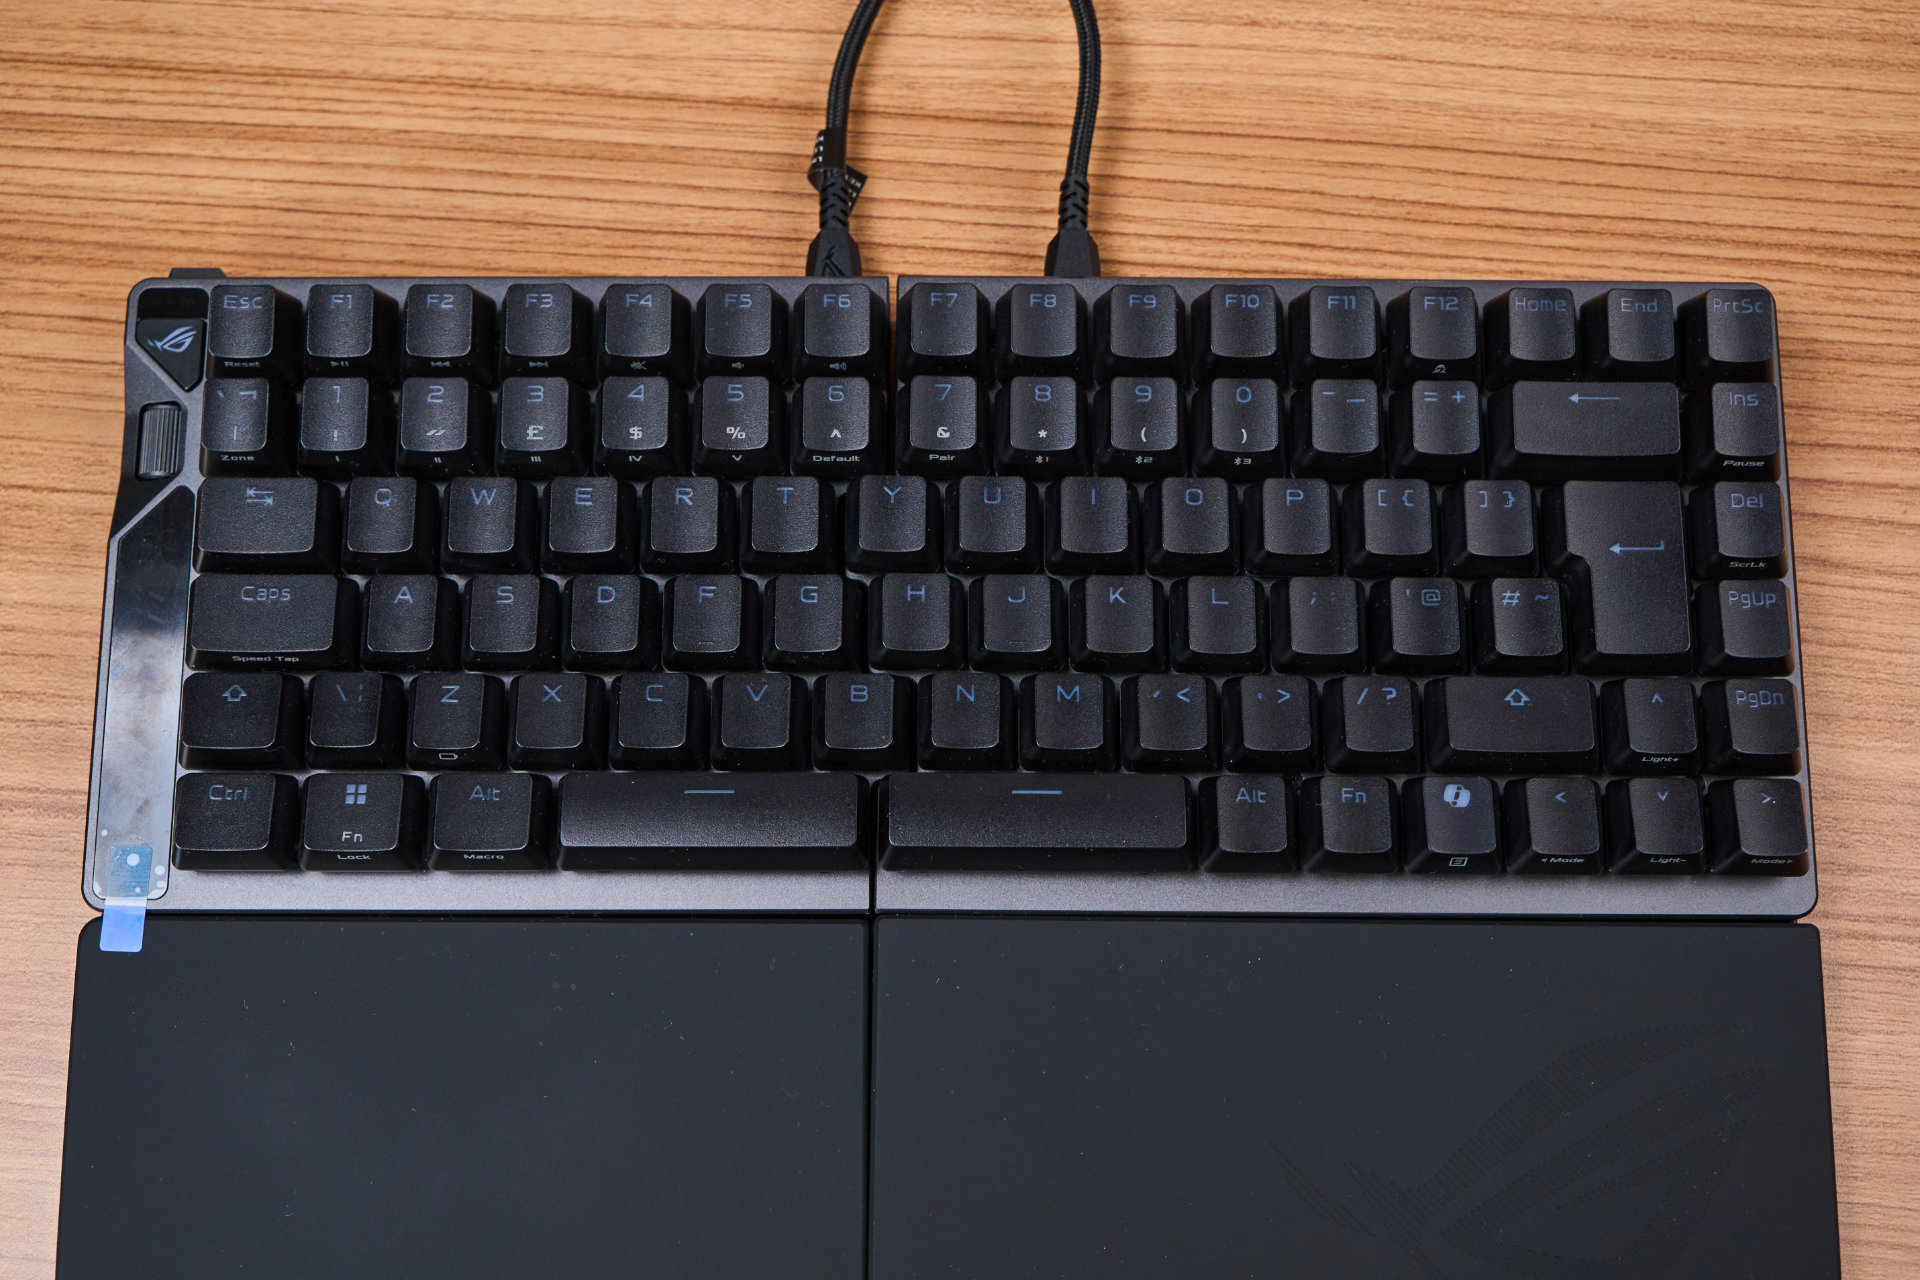
Now for the keyboard. To start, the layout here is interesting (Aside from the fact that this is an ISO model rather than ANSI, we use ANSI here) as it adopts the non-exploded 75% size for a more compact form factor, which matches its design philosophy of opening up more space on the right side so that the mouse has more pad estate to move around.
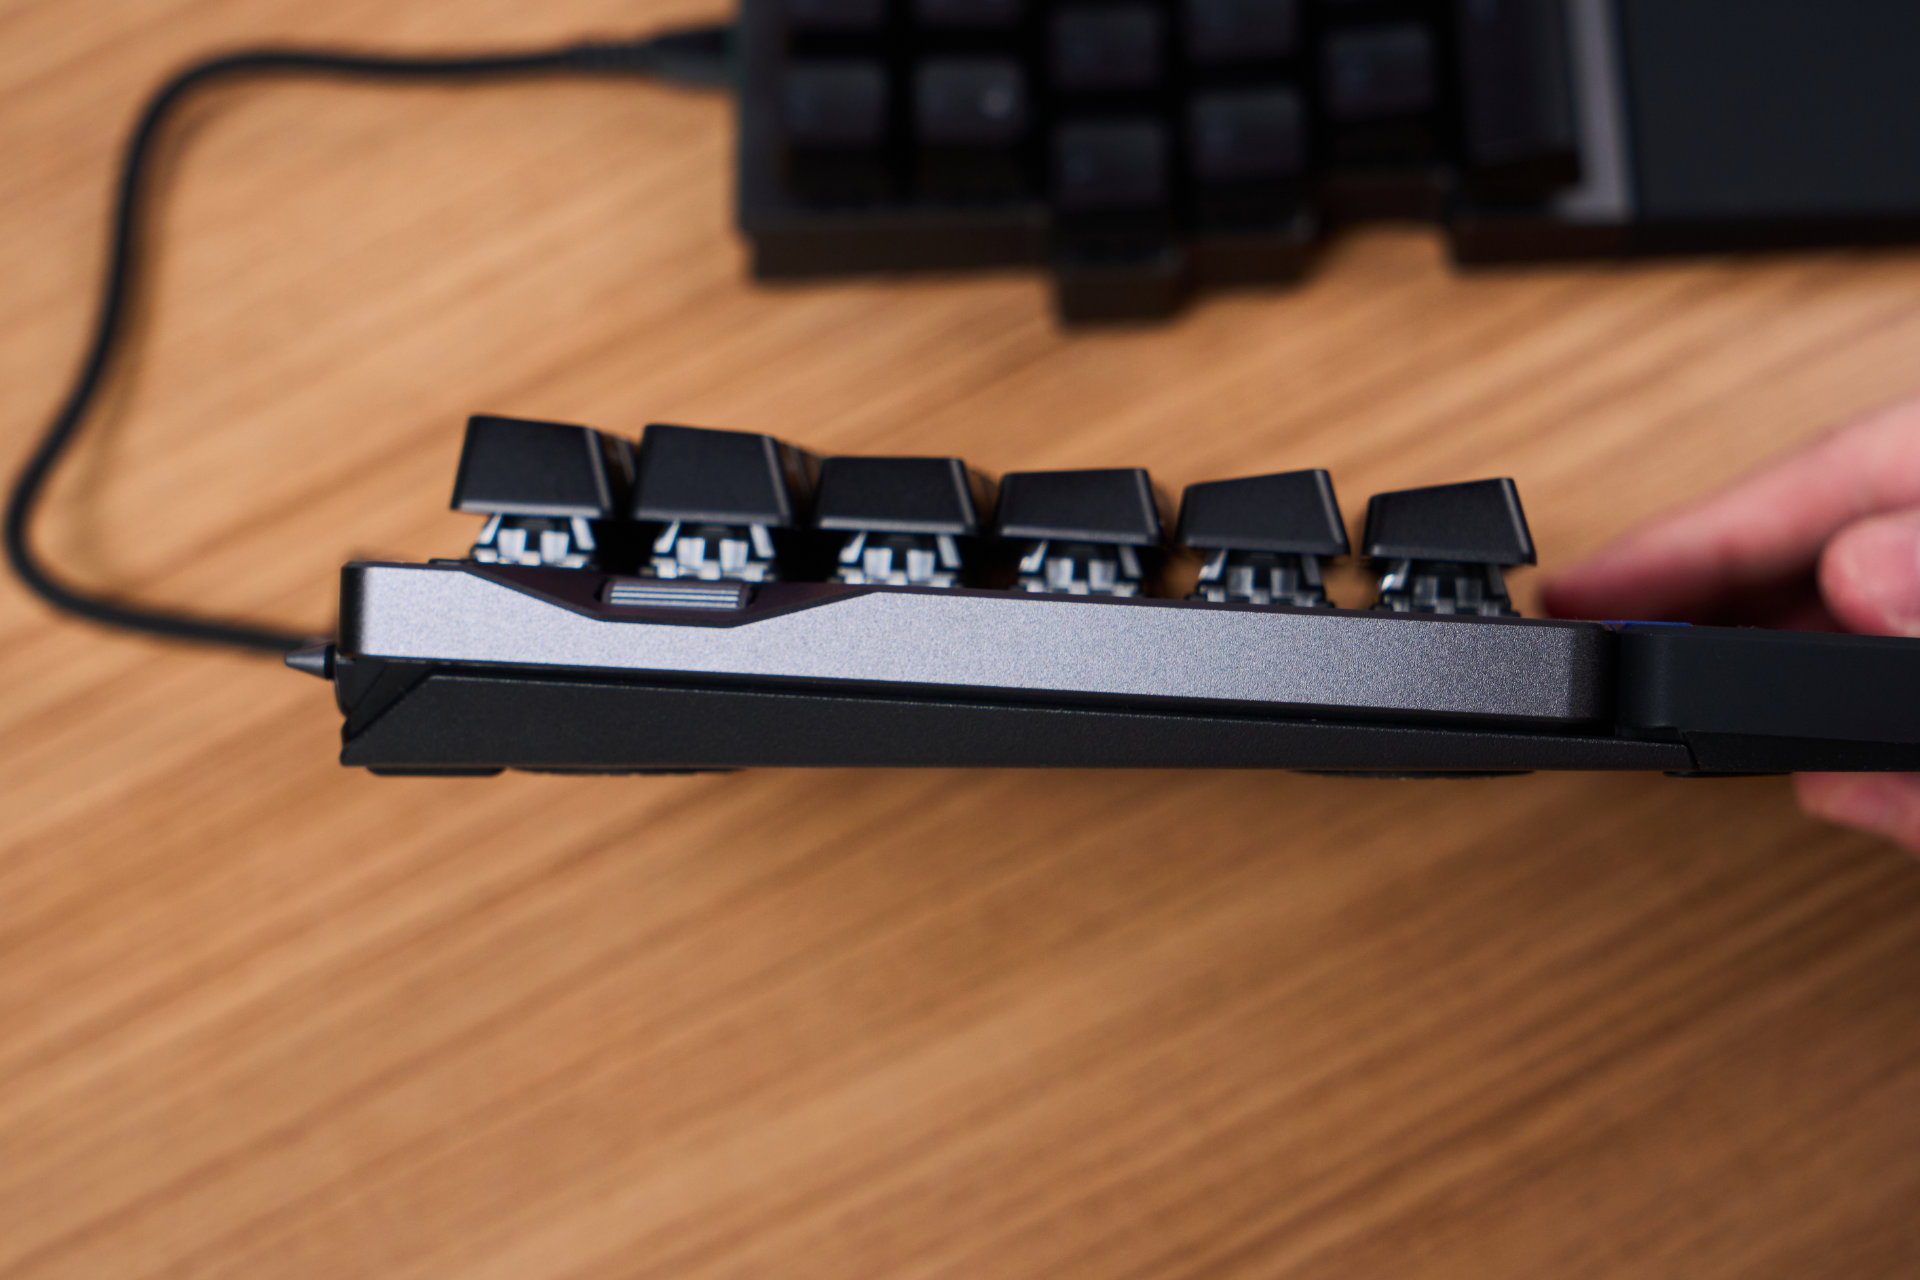
While the wrist rest is included within the retail unit, it is not pre-assembled, as opposed to the state we got it. But yeah, use it or not, all up to you. And you’ll also have a set of feet with two different heights, 4x individual units each, for the comfy and optimal angle. You install it with the included allen key by sliding across the predetermined holes and just screw it in.
If needed, you can also go for a tented ergo style where you install the taller feet on the inner side, then the shorter ones on the outer side. For me personally, I enjoy low typing angle most of the time, so the flat angle make sense here.
The main benefit of going for a 75% size is that it retains most of the most used group of keys, such as the F row and the arrow cluster, as well as several navigation keys (Plus that all important Print Screen, heck yeah). Combine that with the split nature, the Falcata is actually a pretty versatile and flexible keyboard to be honest – Keep only the left side for gaming, pull back the right side when it’s time to flame your teammates in the chat.
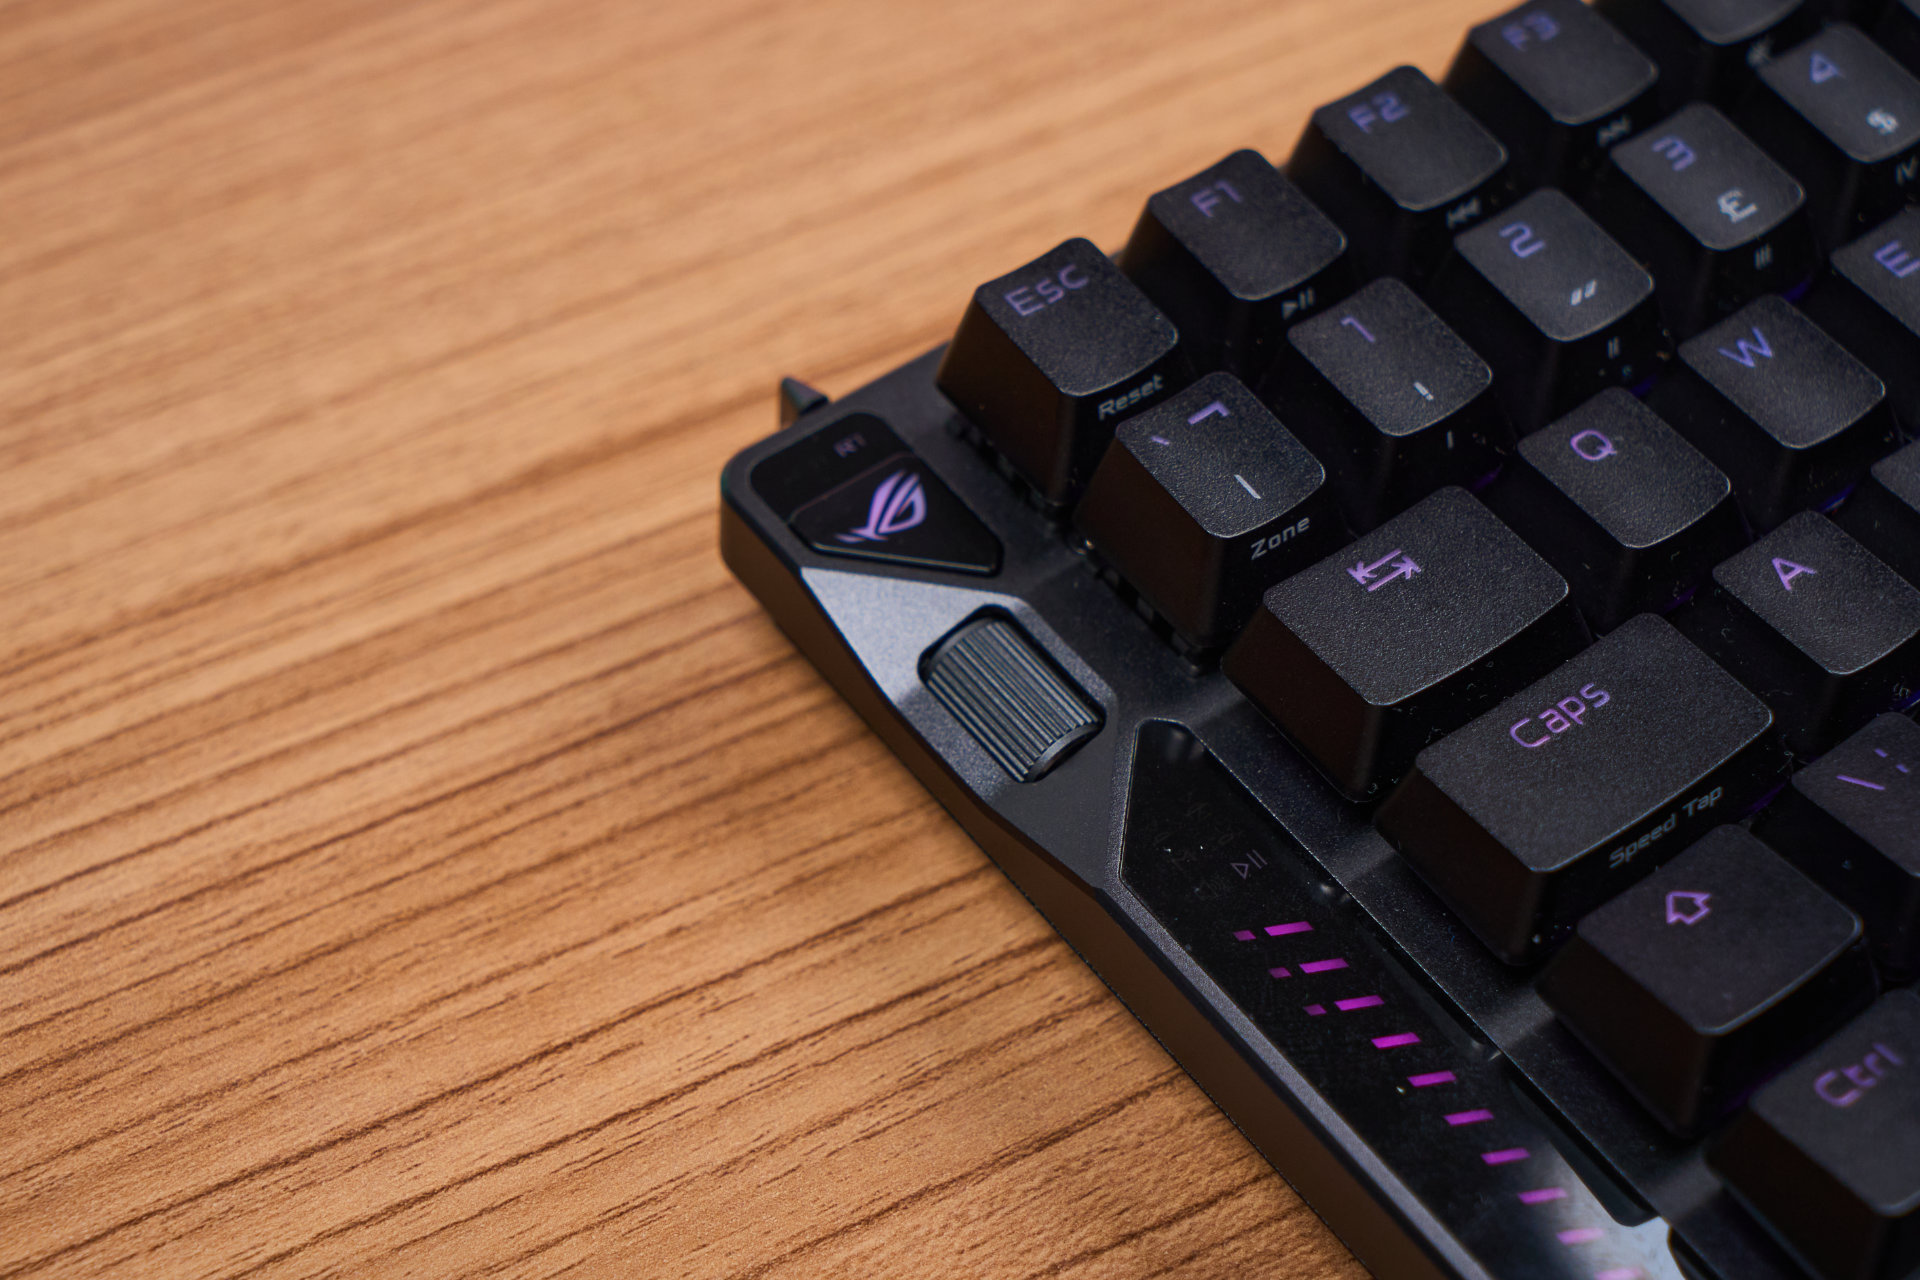
Looking at the front side, you have this little flick toggle at one of the top corners, which is used to enable Rapid Trigger. Yes, one dedicated physical nub for one function, as well as a small indicator ‘RT’ that tells you it is enabled – totally speaks to the level of premium plus convenience of the Falcata.

But the other side’s quite sensible and nice in my opinion, as the USB dongle just sits nicely there, and it is easy to pull out yet tugs nicely during transportation.
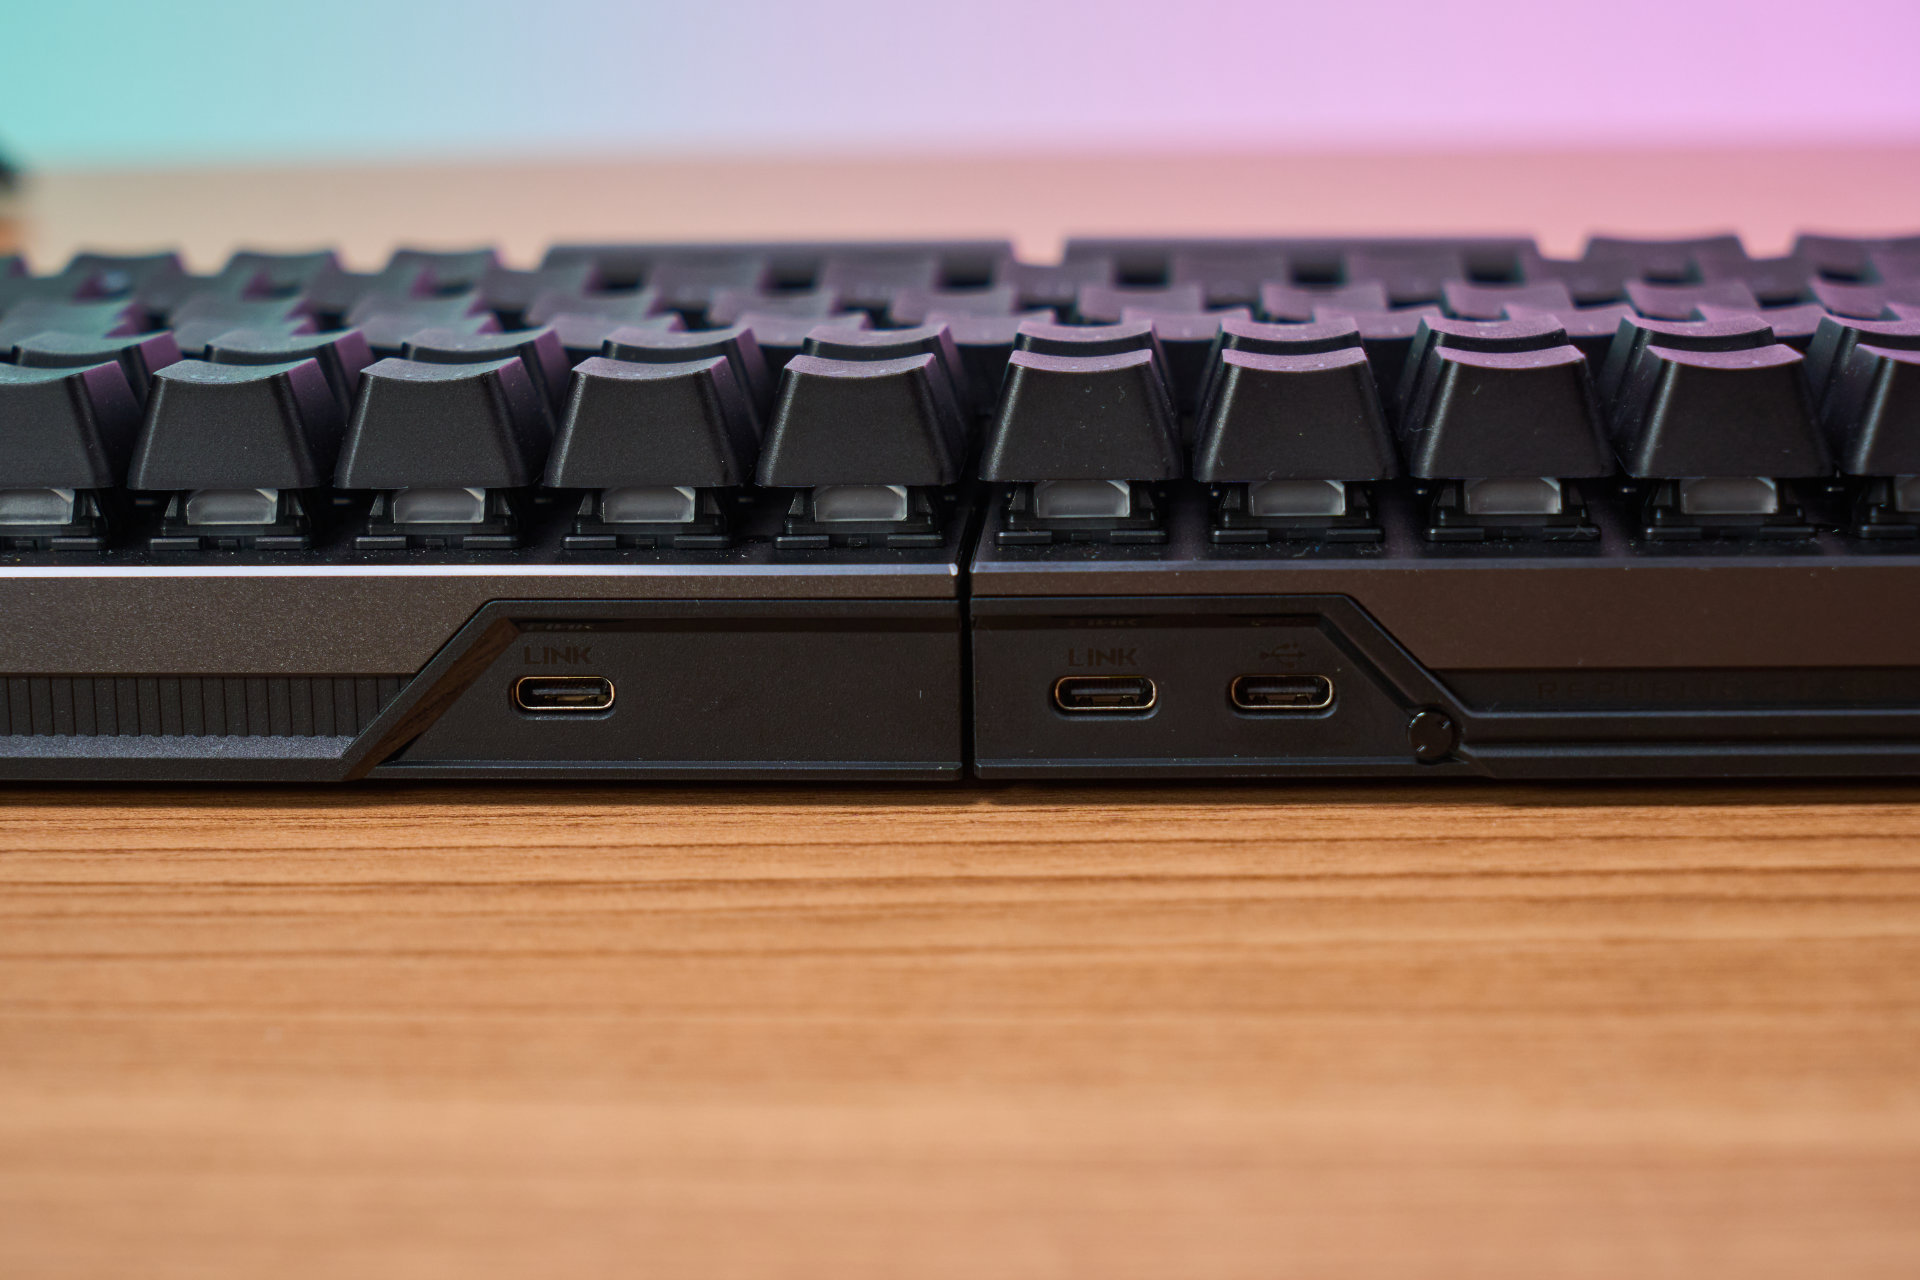
As for the middle, you can see the ‘LINK’ label where you connect the two halves with the shorter USB-C cable, while the ‘non-labeled’ one is for connecting it to your PC via wired connection.
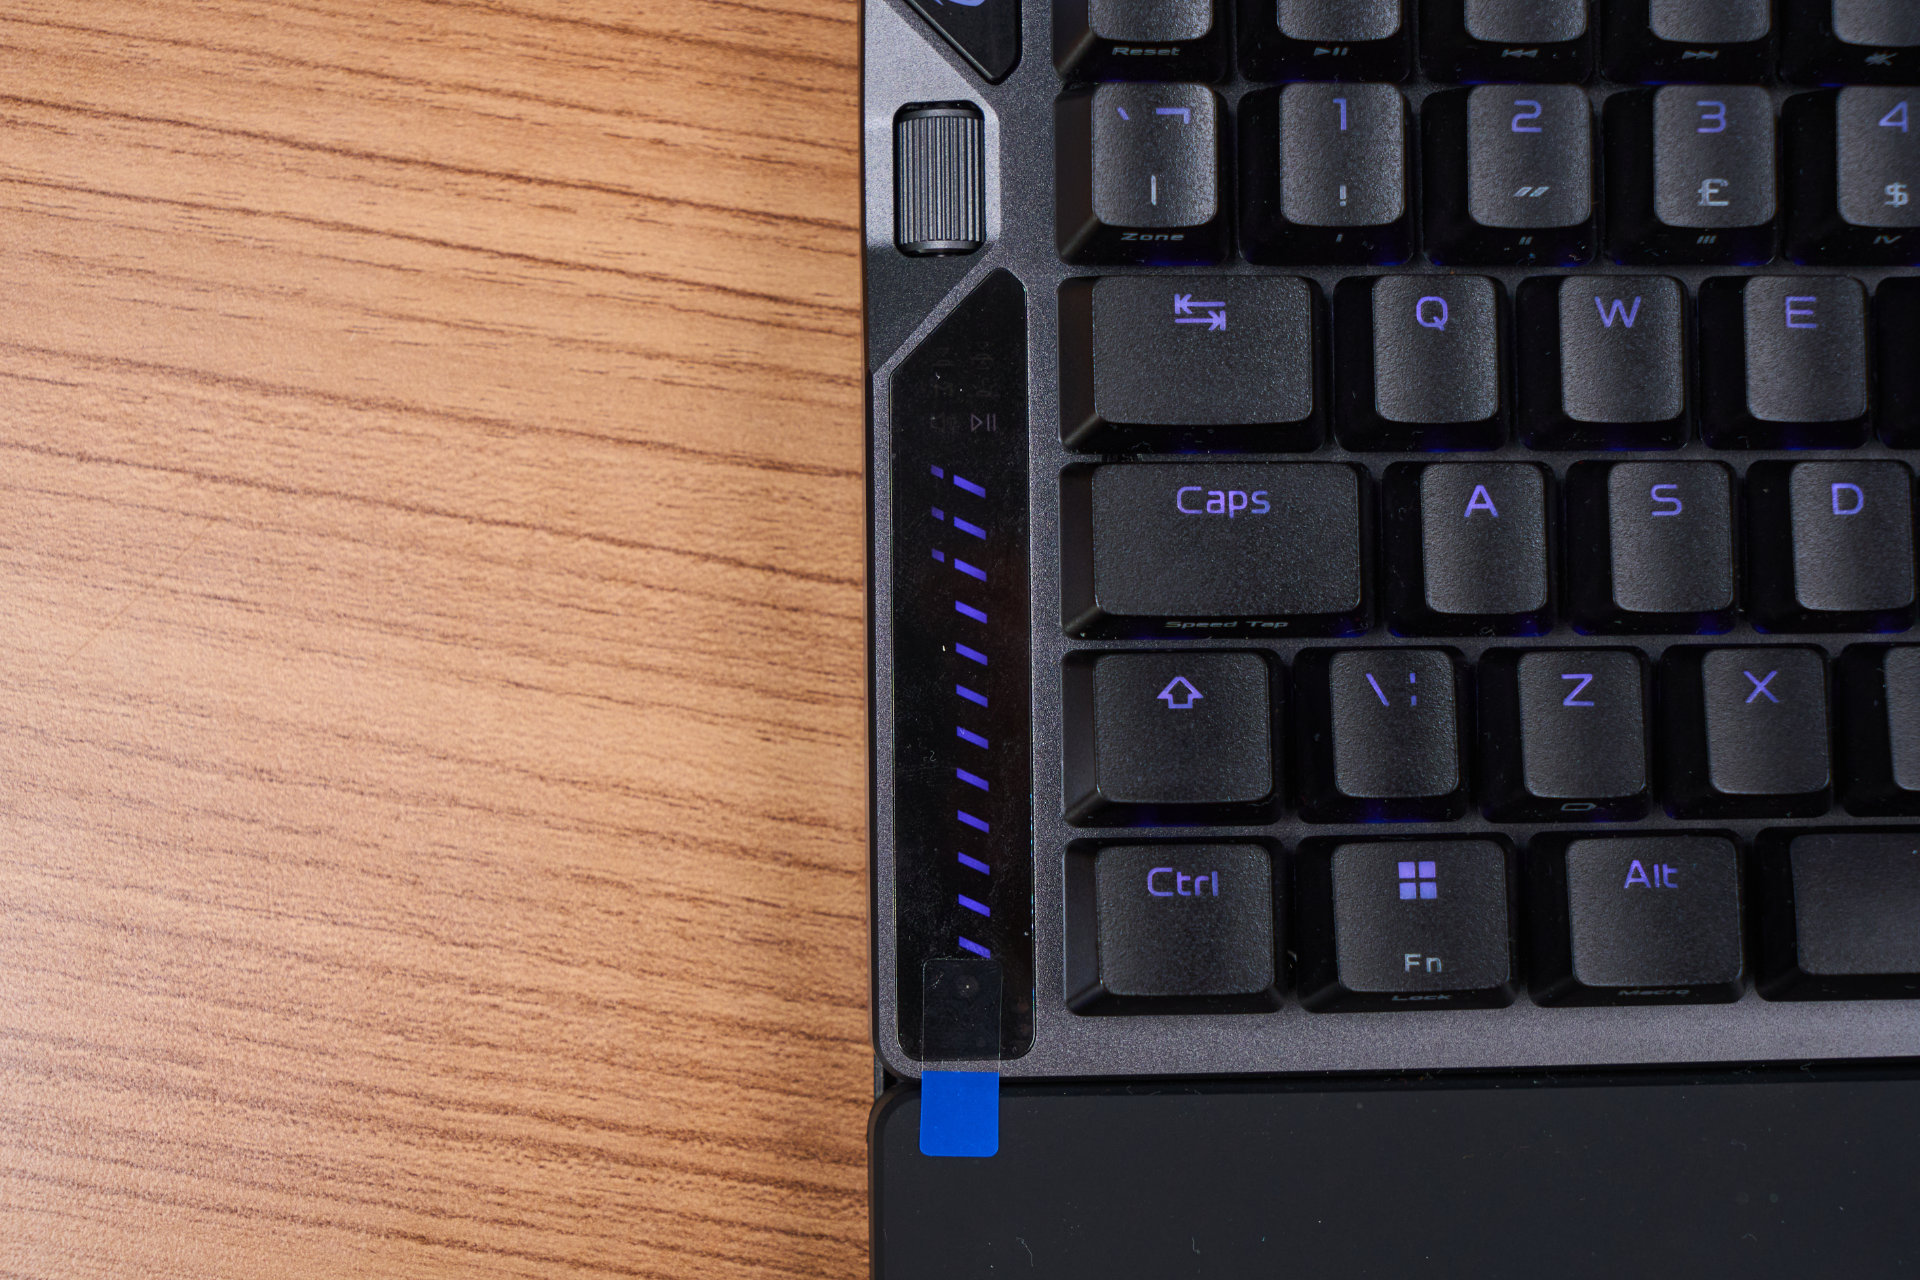
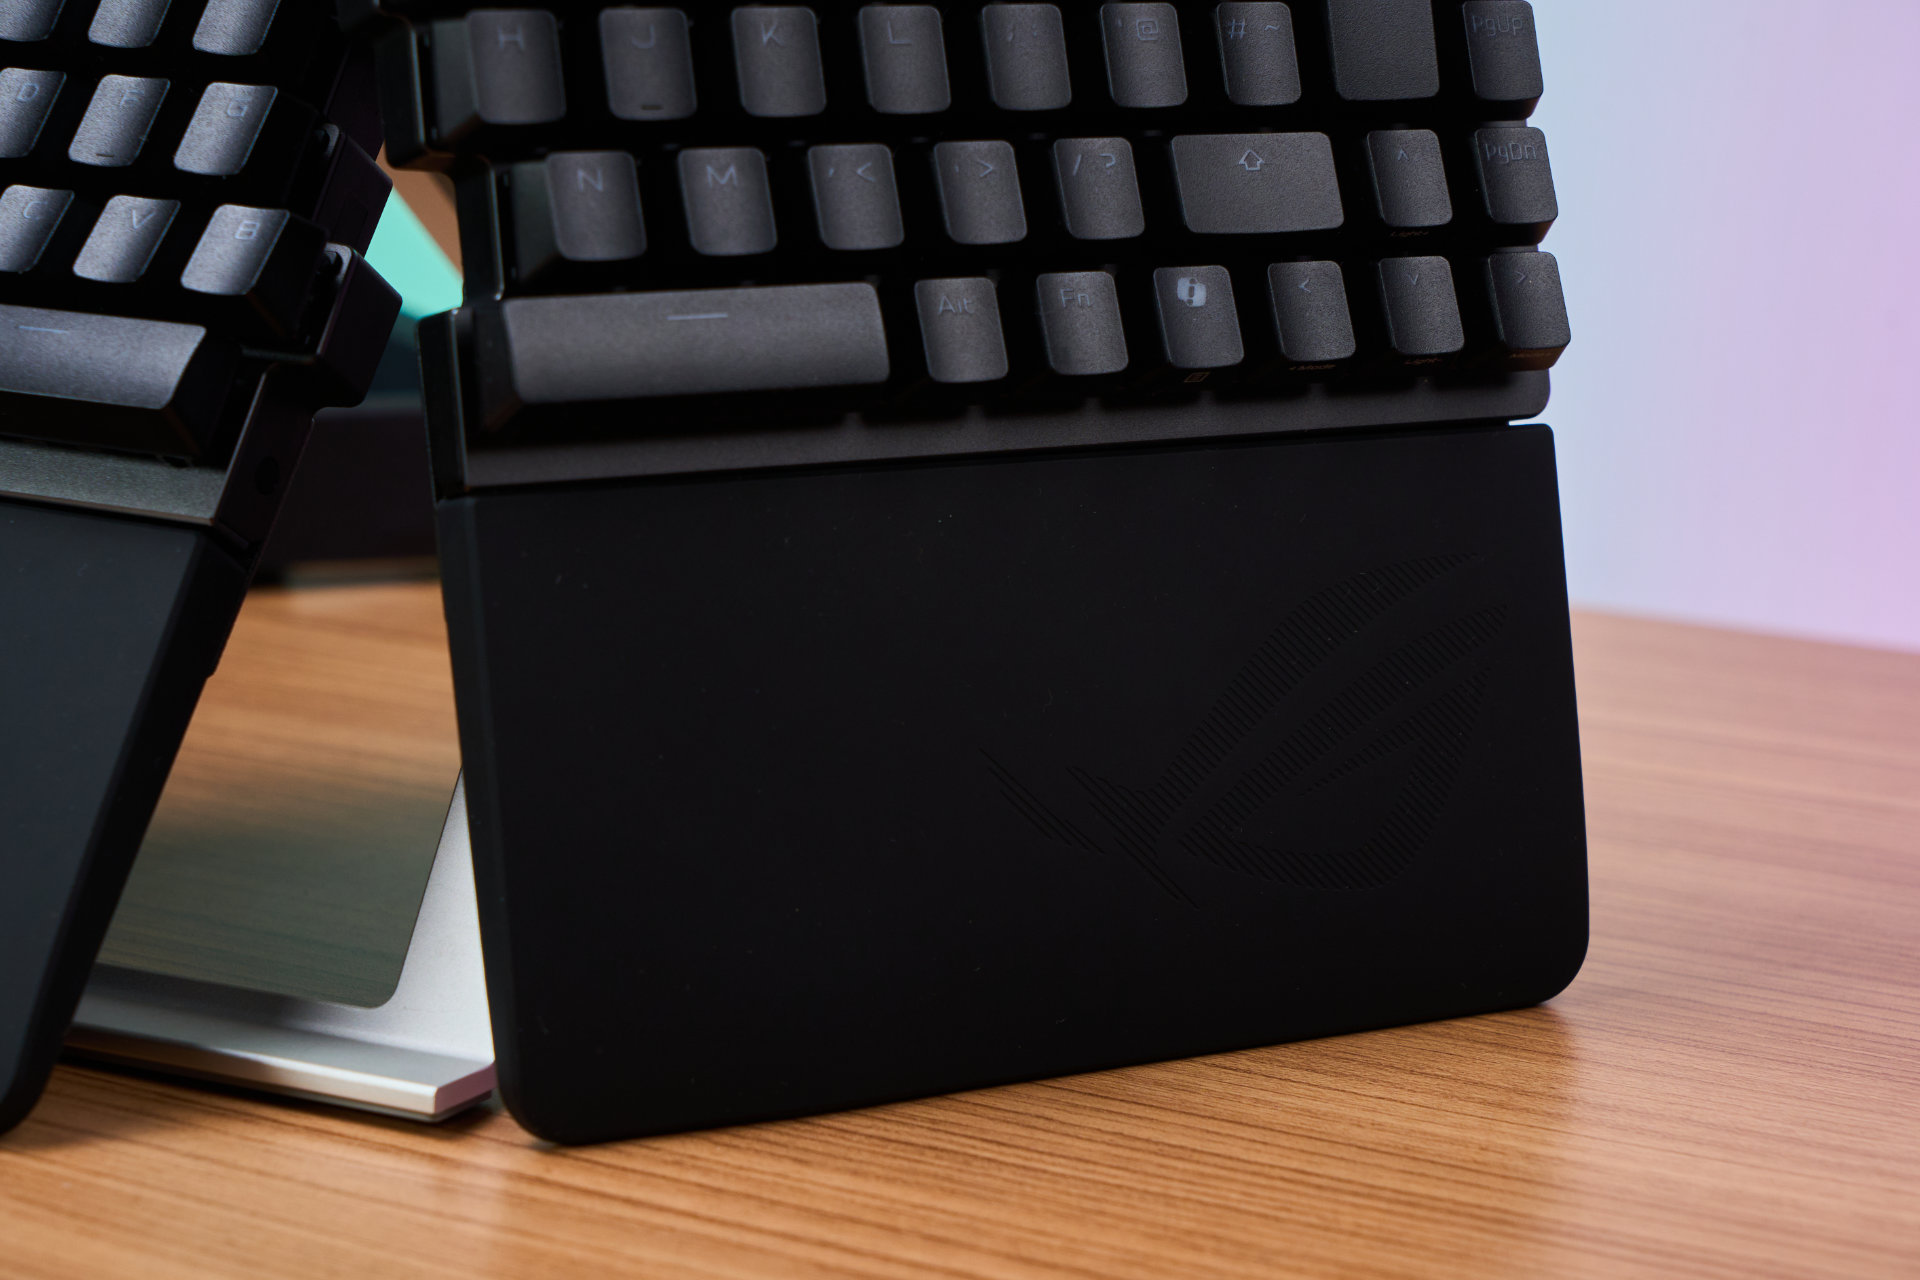
Now let’s talk about this sidebar, and to my preference, I think this is way cooler than the ROG Azoth’s OLED screen (I’m just not really a screen guy, but that OLED thing is gorgeously vivid), as it blends into the aesthetics quite well as well as the general proportion of the keyboard, since after splitting it in half in the middle, you technically get shorter horizontal portions, therefore the vertical bar pairs well in this regard.
And you can see a little indicator sitting above the strips that tells you which Mode it is currently at, and there are 6 that you can use, switched through by pressing down the ROG logo (Yes, it’s actually pressable, the usability design is actually nuts). Dude, even the multiwheel is clickable.
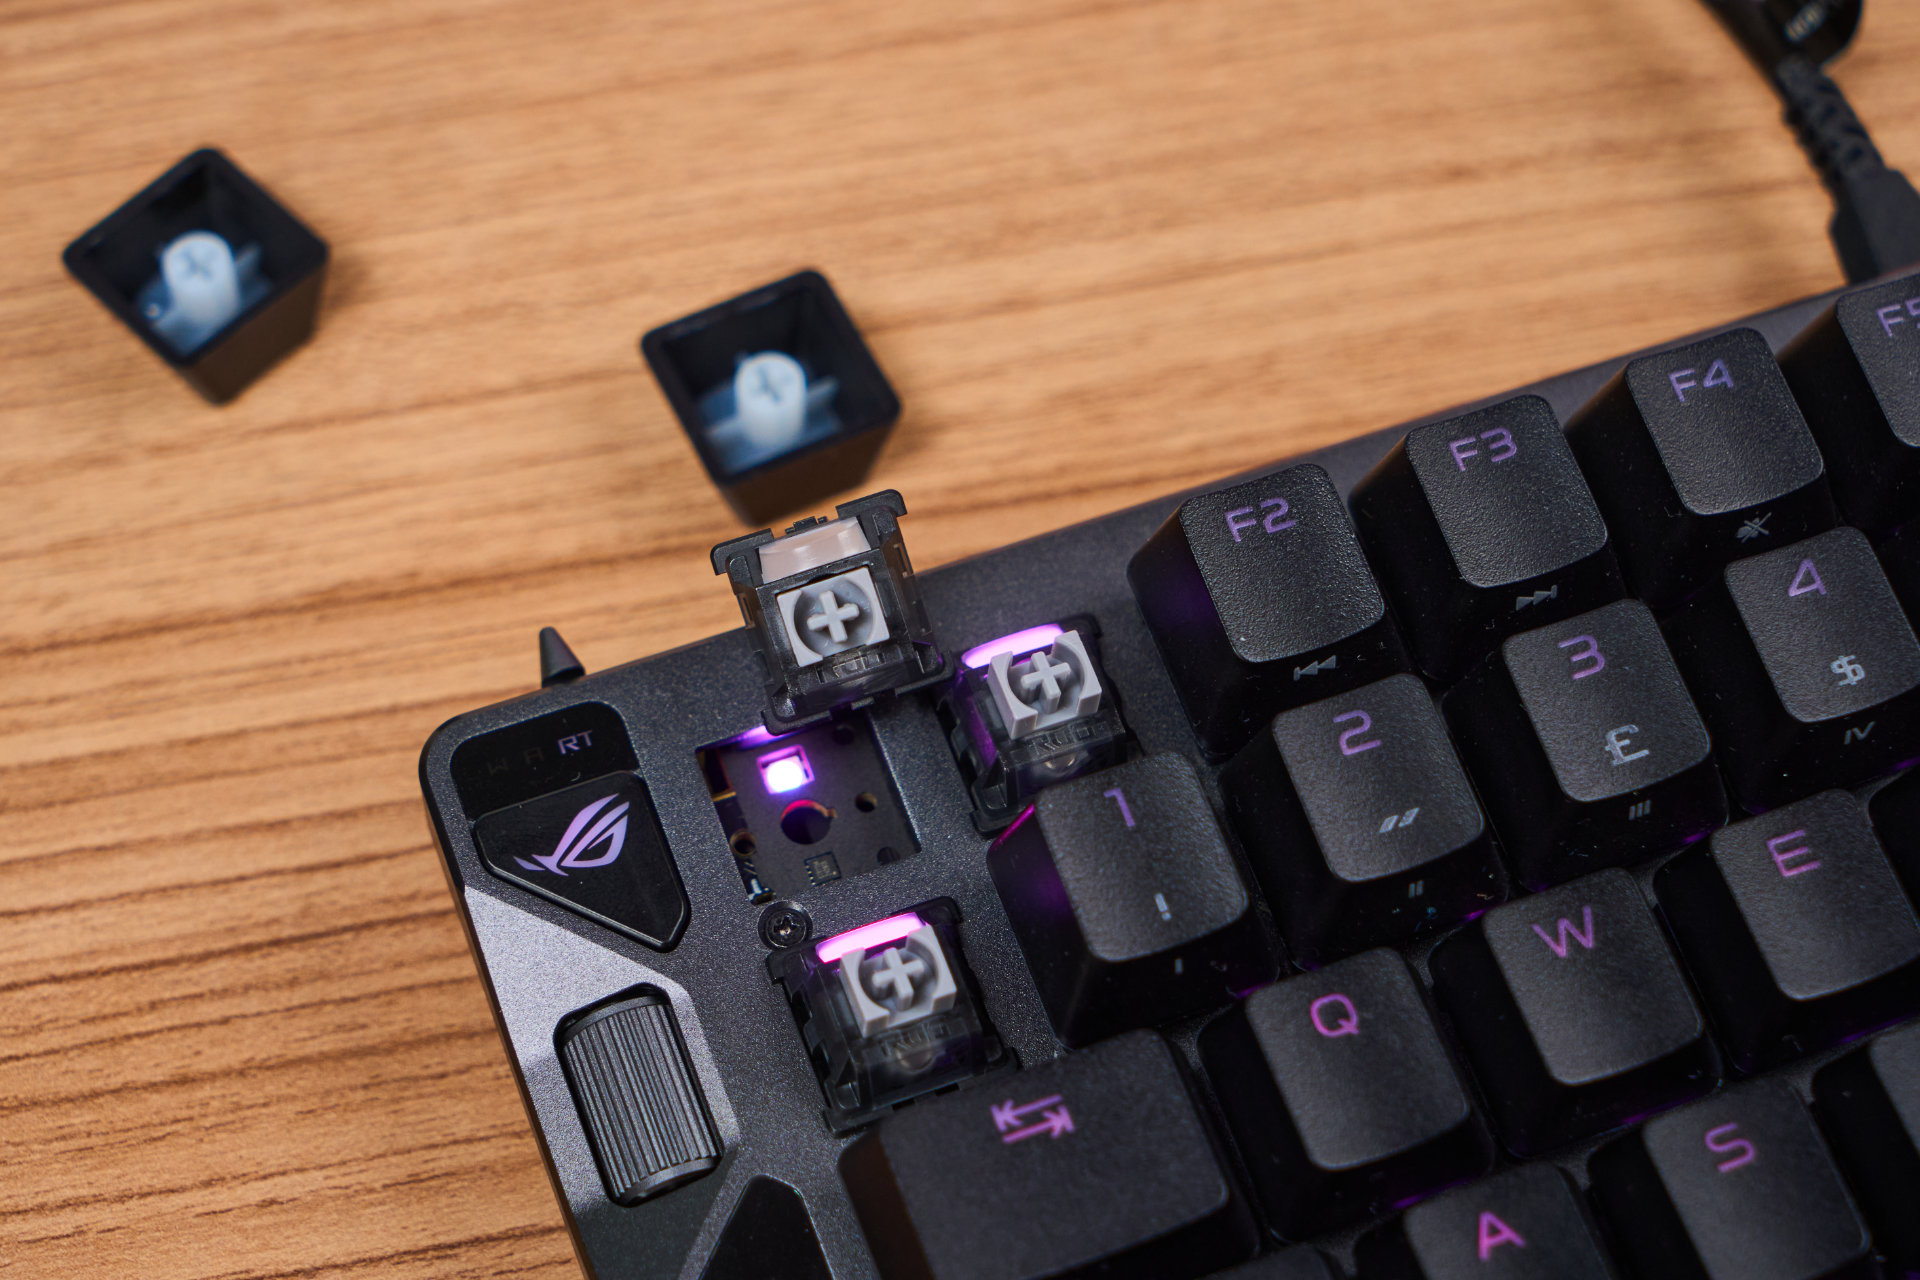
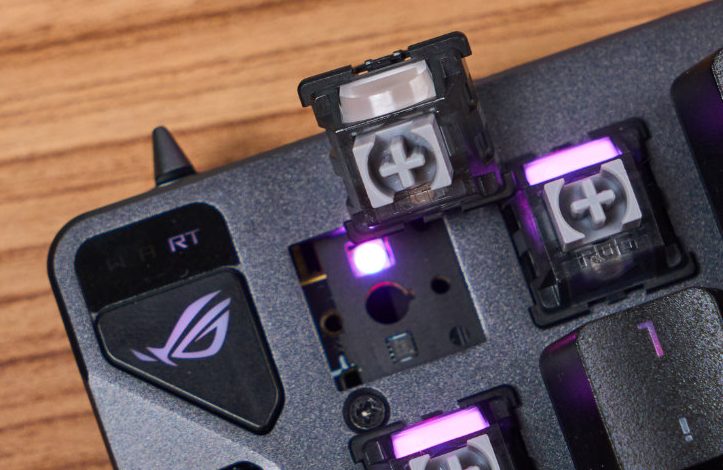
Under the hood, it runs the ROG HFX V2 magnetic switches, which are made in-house (not sure who’s the OEM) with a silver stem and overall monochrome-colored housing. In case you don’t know, magnetic switches have been giving mechanical keyboards a run for their money beginning in 2024 due to how adjustable they are, thanks to the use of magnets to detect keystrokes.
Since magnets are analog signals, and analog signals are, in a sense, “always on”, PCBs could read the flux difference through distance, therefore allowing the software to know how “far down” the user has pressed, which can be extremely useful in things like racing games.

Coming in at 32g of actuation and 49g of bottom out with 3.5mm travel distance, the overall feeling is similar to the likes of “speed switch” or “long pole” switches, leading to faster inputs in general. It is also pre-lubed linear, and to be fair, it is quite smooth through typing feel alone. However, there’s this “scratch” sound across almost every key that could be the result of “slightly uneven lube” or due to the nature of the materials used to produce the switch.
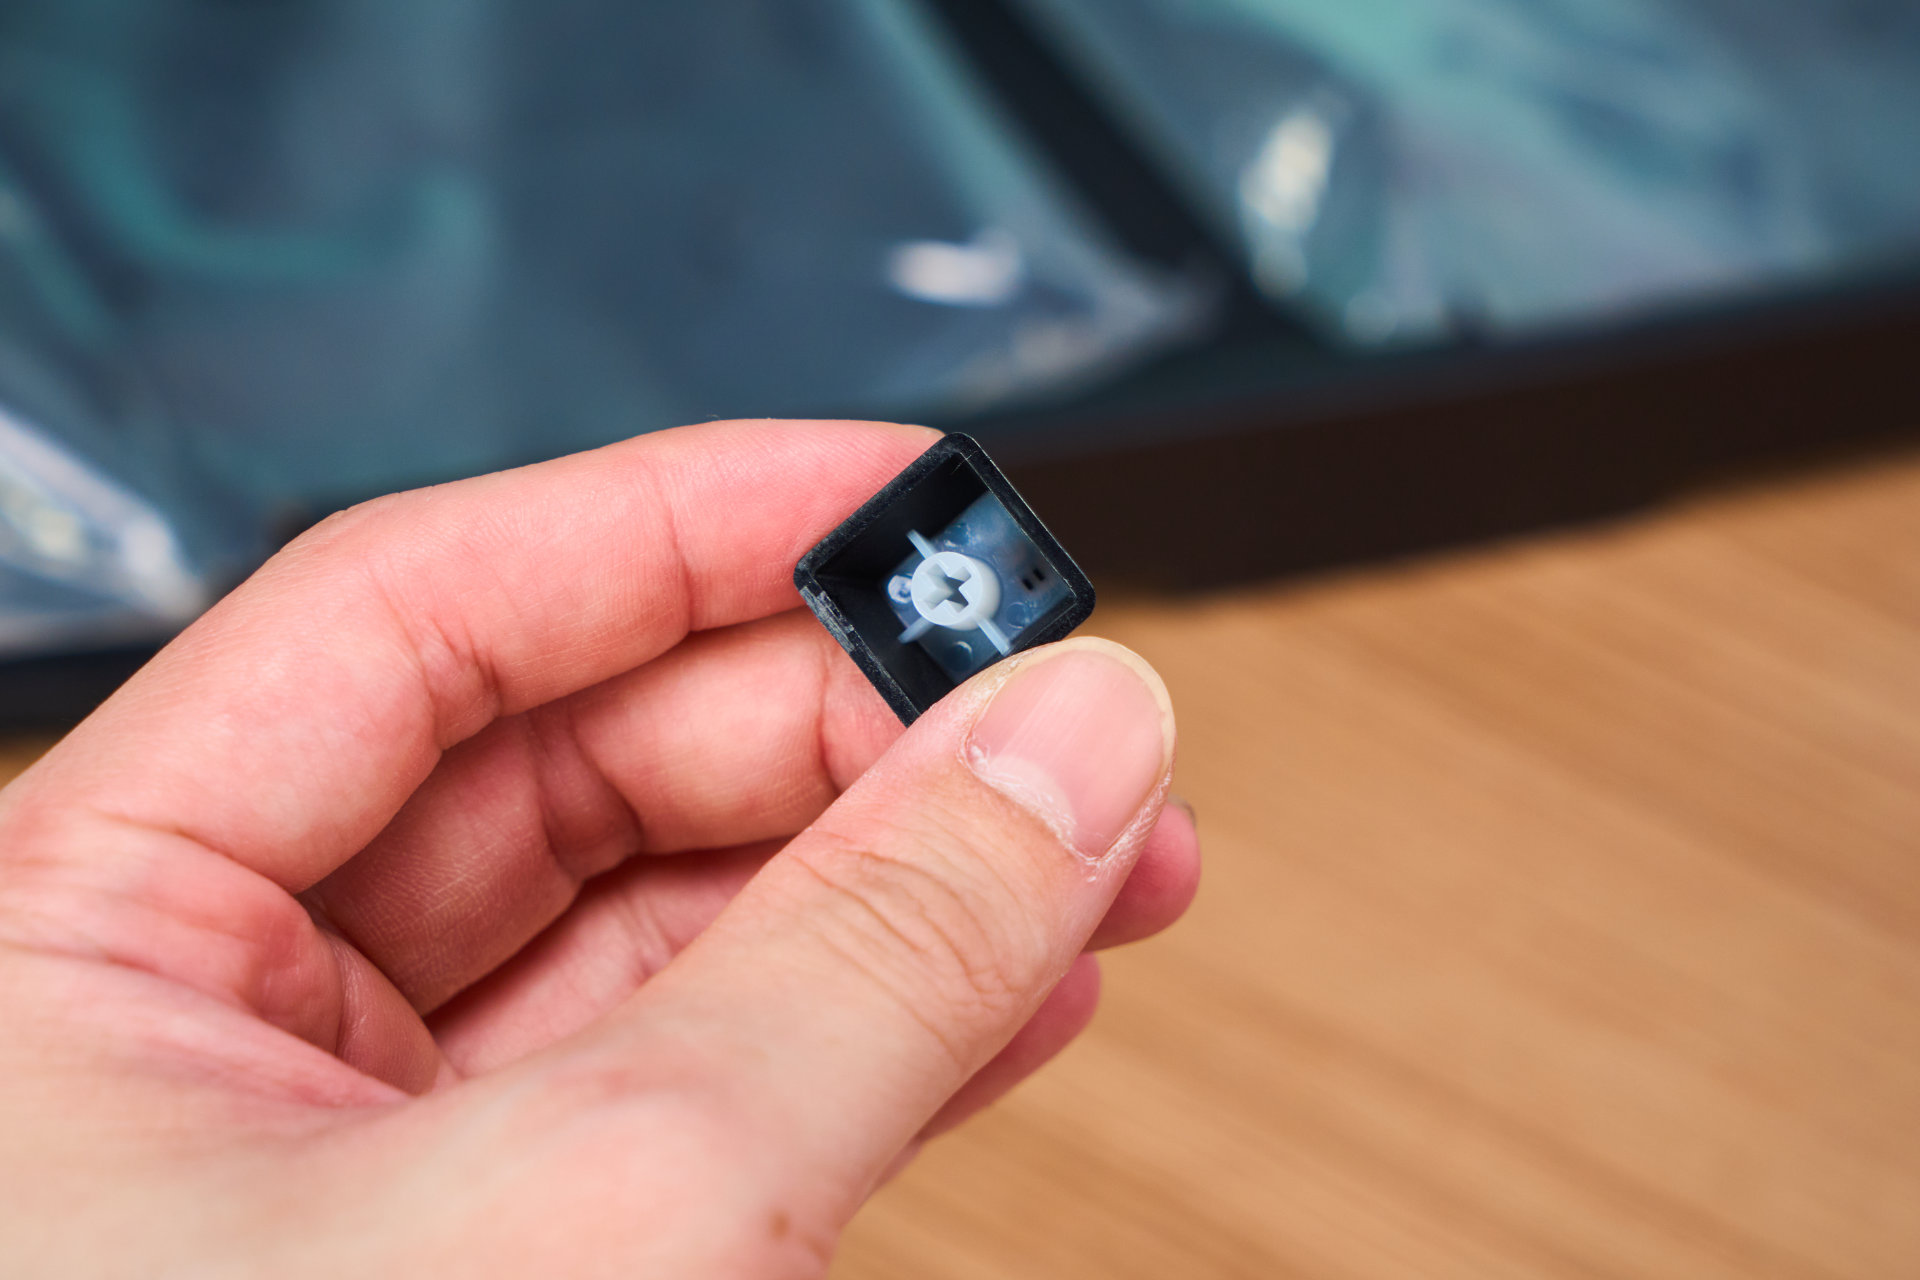
By the way, the combo is a PC top + POM bottom + POM stem, with the latter utilizing a “box stem” design that reduces wobbling (to a degree, not fully) while keeping out dust and debris, making it quite the low-maintenance board. The MX style stem means that it is compatible with aftermarket keycaps that are designed for “mechanical”, so go ham and full on customization to the best of your liking.

Speaking of low maintenance, the Falcata is not your typical gaming keyboard in the sense of using the “clip mechanism” a.k.a snap fit to form and locking down the frame, and instead, this is a screw-together design, which means all you need is taking off the keycaps to get access to the top surface, which is flat, allowing you to clean any nails and nit bits off it quickly with a small brush.
Typing Habits
Now this is quite subjective since I, just like a whole lot of you, only used standard keyboard layouts up to this point. Therefore, the first thing to readapt is definitely the typing angle despite the Falcata using a standard ISO mapping, and don’t get me started on “rearranged key positions” offered by Alice boards.

So as long as you get your arm to a comfortable position, and assuming that you’re a proper typist, you can quickly get back to it after like 30 minutes of typing. So from the get-go, it’s not too hard to relearn.

However, what I have to learn from scratch is that due to the split nature, the Y key is located on the right side, while the B key is positioned on the left. Although I’m a “right Y” guy, I’m also a “right B” guy; thus, actively trying to stop my right hand from going for the B key is definitely tough. But, after a couple of days of using it while also reviewing it as a whole, I’d say that I learned a new muscle memory that doesn’t overwrite my old habits.
Just FYI, Alice layouts have two Bs, so you don’t need to run into this sort of thing.
I do wanna give praise on the wrist rests as well – they are skin-friendly, which means there are no rashes or irritation from long periods of typing, and they are properly angled for extended comfort.

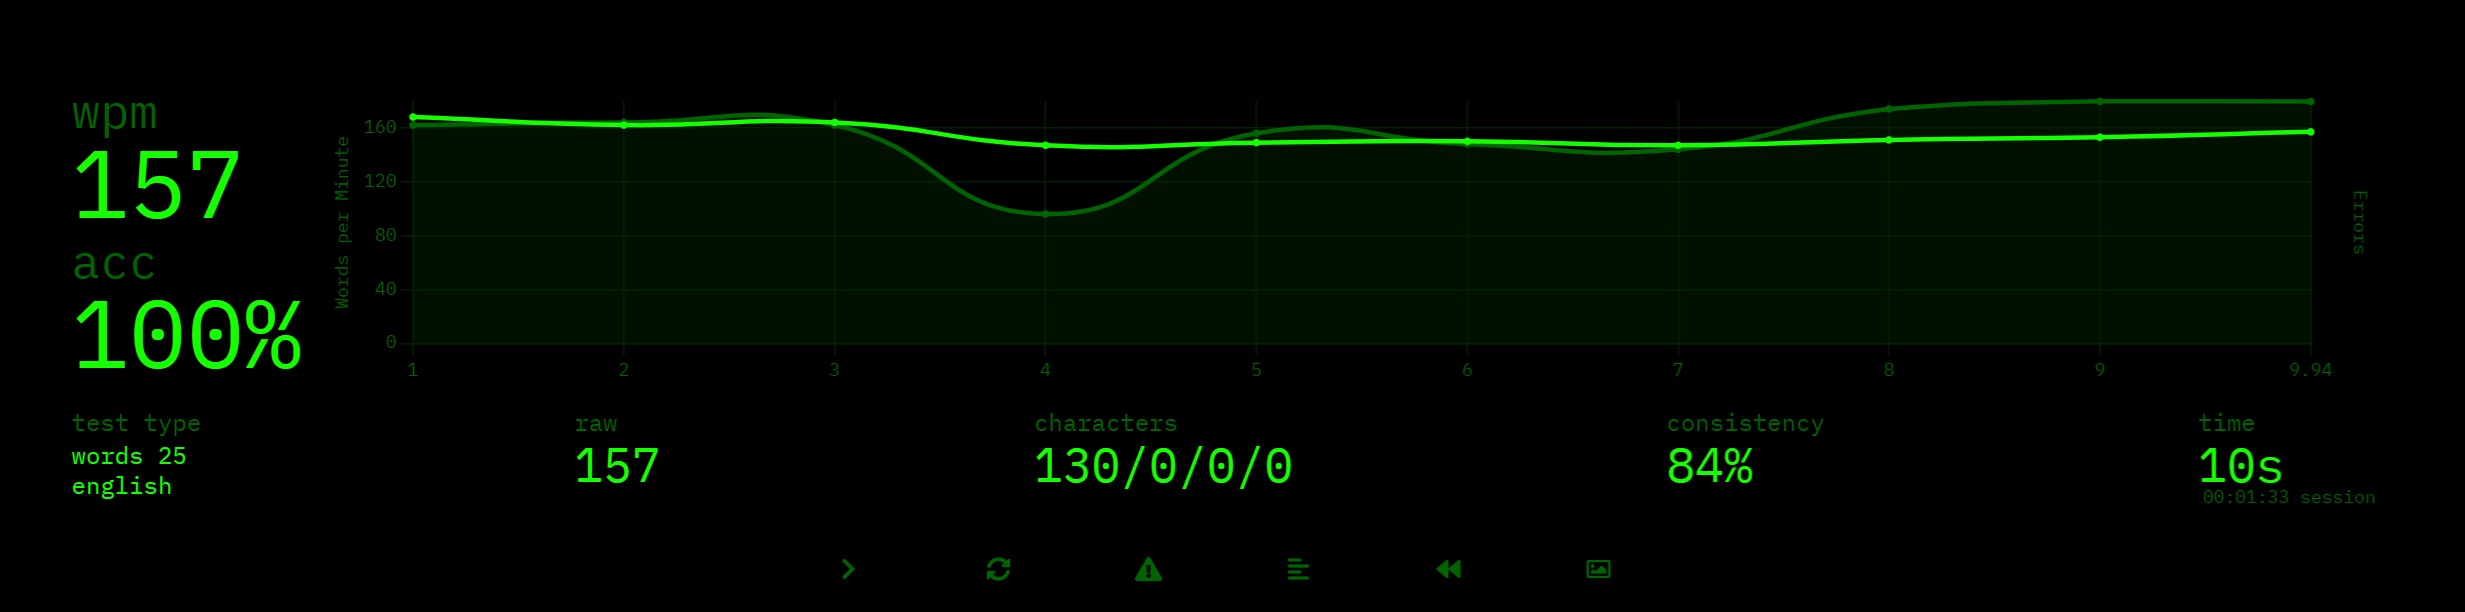
In short, after a couple of days, I’m now comfortable and consistently hitting around 155-160 WPM.
Game Better with GearLink
I know, sometimes it just feels troublesome to install a “bloatware” to enable all the features on a gaming keyboard, and that practice is at least a decade old. But not anymore, thanks to the rise of web-based configurators such as VIA powered by QMK that spawned derivatives such as VIAL and ZMK.
But that’s not the main character for ROG gears, because they have their own offering as well – the GearLink website.
Through the URL of gearlink.asus.com, you can immediately get started – Just hook up the Falcata either through a USB cable or use the included ROG SpeedNova 8K receiver (aka the USB dongle).
After connecting it successfully, you can start meddling with all the key settings either per-key or to every key, and there are a lot of options that you can tune or enable, including:
- Dynamic Keystroke – Register multiple inputs or actions to a single button, adjusted through actuation distance/”checkpoints” (Such as do A at 1.5mm, do B at 2.0mm); Supports up to 4 actions
- Mod Tap – Same as Dynamic Keystroke, except it is about tapping and holding; Supports up to 2 actions
- Toggle Trigger – The tried-and-true autofire capability (Tap to fire continuously, tap again to stop it, tap and hold to only fire once)
- Keyboard / Mouse / Multimedia / Quick Access keys for general remap
You can also do the same via the Fn Combo Key Assignment page if you want to do the above through the Fn layer.
For the Analog Trigger tab, you can further adjust the actuation point and dead zone to really fine-tune the board to suit your habits and muscle memory, and don’t forget there’s the Speed Tap adjustment, which is ROG’s way of saying SOCD (Holding A first, then holding D will result in only D being registered and held down).
Then you have the Multiwheel tab, and it is more like a control panel for the functions within the LED bar and the wheel itself, you just kind of tick ON or OFF to the features that you wanna use, as well as customize what the custom mode provides. And of course, the Lighting page for all your RGB ooze needs.

Lastly, you have the Mode settings, which you can turn on the Zone Mode (Also accessible via FN+~) where, by default, it targets the WASD keys to be 8K polling while the other keys are set to 250Hz when not being pressed, and this is the page where you customize which key you wanna apply Zone Mode to.
I do appreciate the flexibility in this so that all the power being used (especially in wireless mode, where battery life often pop up as the point of concern) is being pushed to the most utilized keys. Quite the smart application.
From a Custom Keyboard User Perspective
Since I have been dabbling in the custom mechanical keyboard scene for a few years, I’d say that the Falcata has a very straightforward and sort of “tunnel vision” in regards to its direction, which is prioritizing gaming to the best it could while implementing the split design for a unique identity.
Therefore, it doesn’t have the fancy gasket mounts to make it soft and light to use, and instead, it is quite stiff because it is a tray-mounted board. But ASUS did implement 4 layers of dampening materials (Silicone Plate Foam, PORON Switch Pad, PORON PCB Foam, Silicone Case Foam) so that it doesn’t sound hollow. But to be real, nearly all magnetic HE keyboards in the market right now are within the “thocky” sound spectrum and at best, “marbly” tone amplified by the layer of foams (And also due to the materials of the housings, etc).
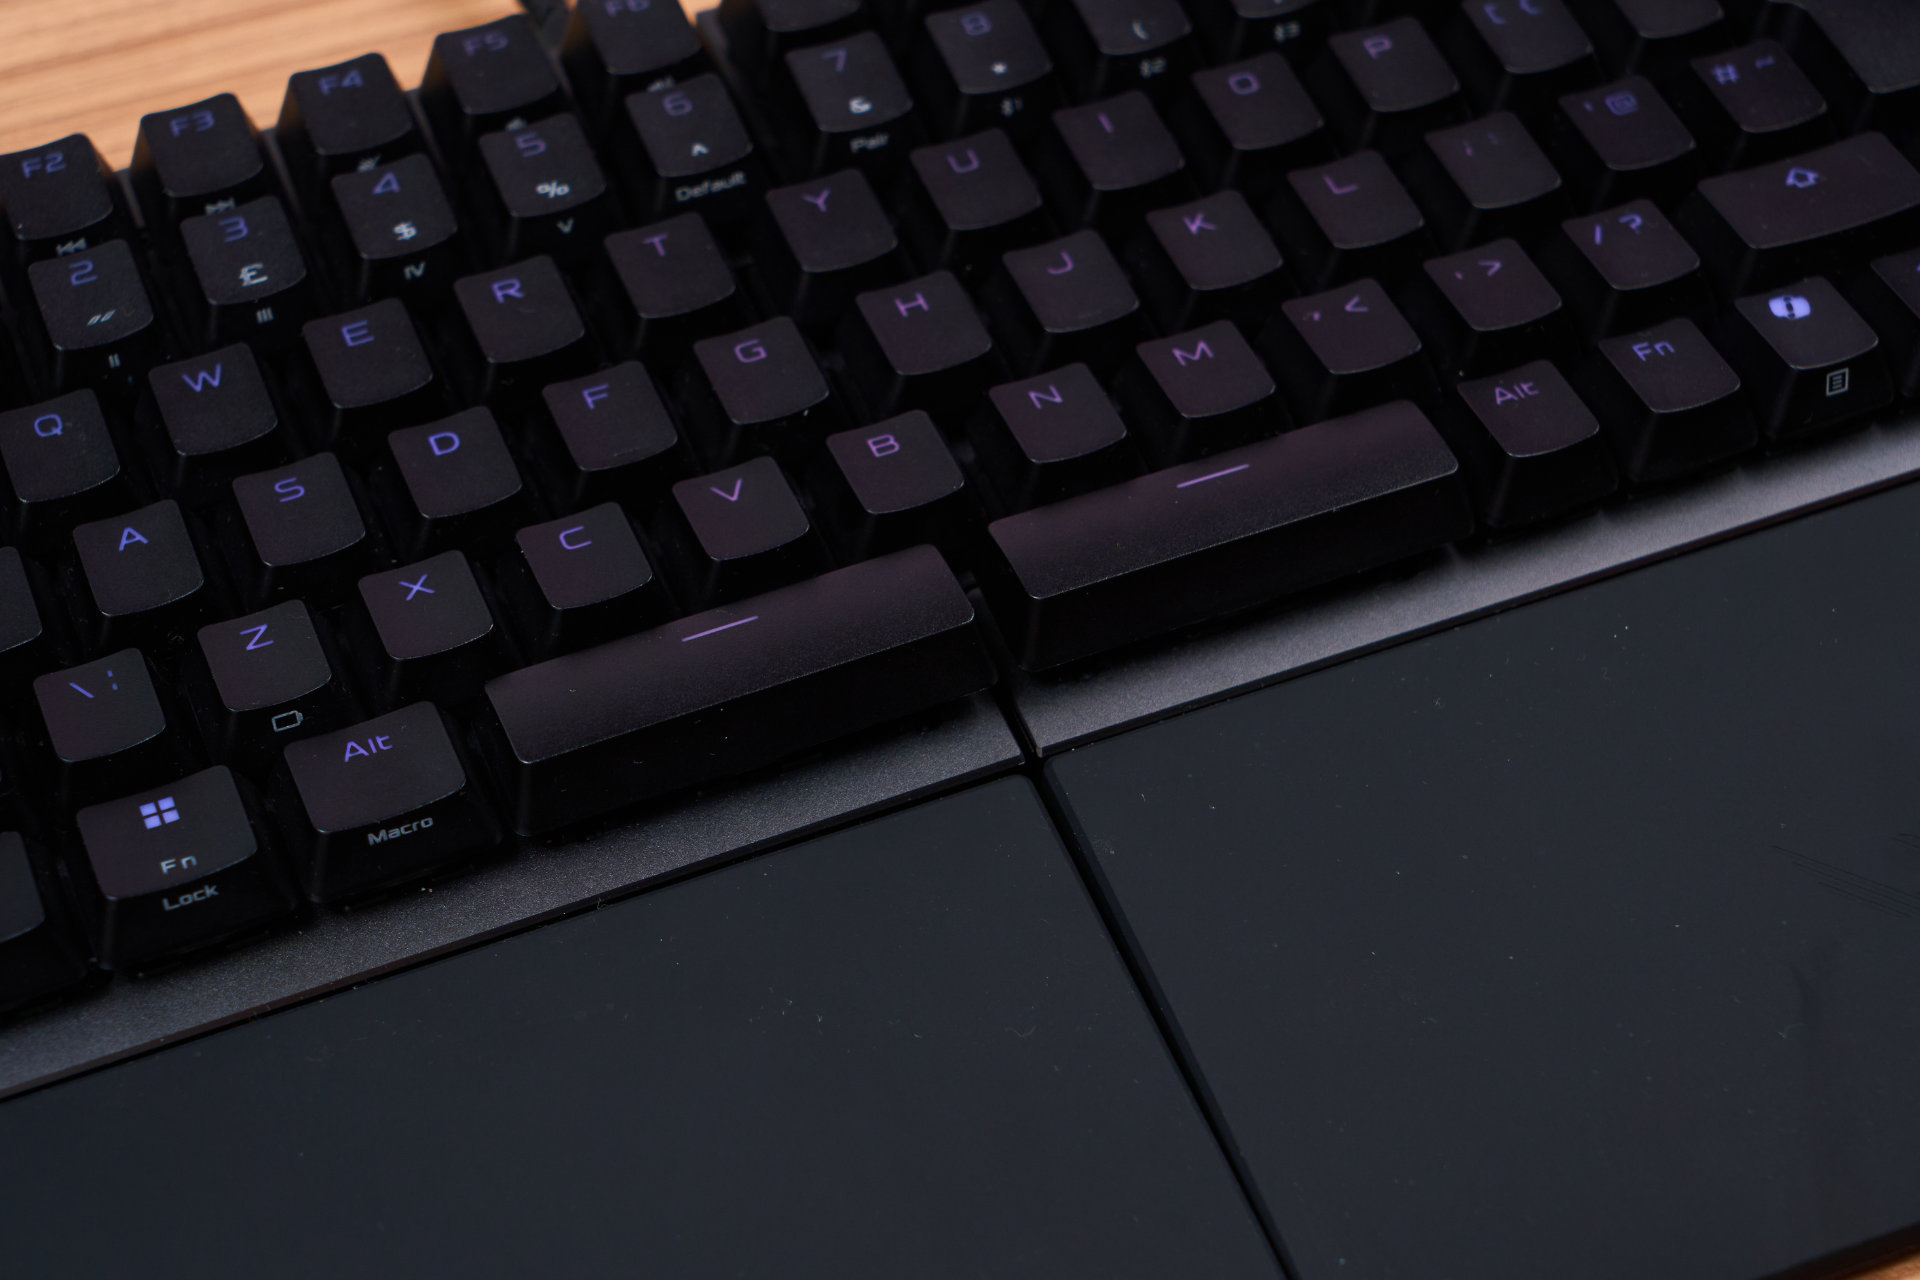
But if you happened not to like “thumpy” or loud-sounding spacebars, the Falcata’s dual spacebar design, which means shorter units on each side, makes it slightly sharper in pitch but generally quieter than the conventional 6.25U or the longer 7U spacebars.
And sure, the switch socket design is hot-swap since you don’t need metal contacts for signals to go through, but due to the use of the proprietary ROG HE sensor on the PCB, it seems like aftermarket HE switches like the ones I have, the Gateron Magnetic Jade Pro, don’t work whether it is installed north-facing or south-facing.
By the way, the RGB’s north-facing due to the pairing needs with the stock shine-through keycaps.
Speaking of keycaps, the one I have here is the ROG PBT doubleshot variant, which will be the go-to for gamers with sweaty and oily hands, so that you don’t have to OCD and wipe your fingers constantly (Eating in front of your PC gang where you at). But there’s also the ROG UV-coated ABS keycaps, depending on the region.
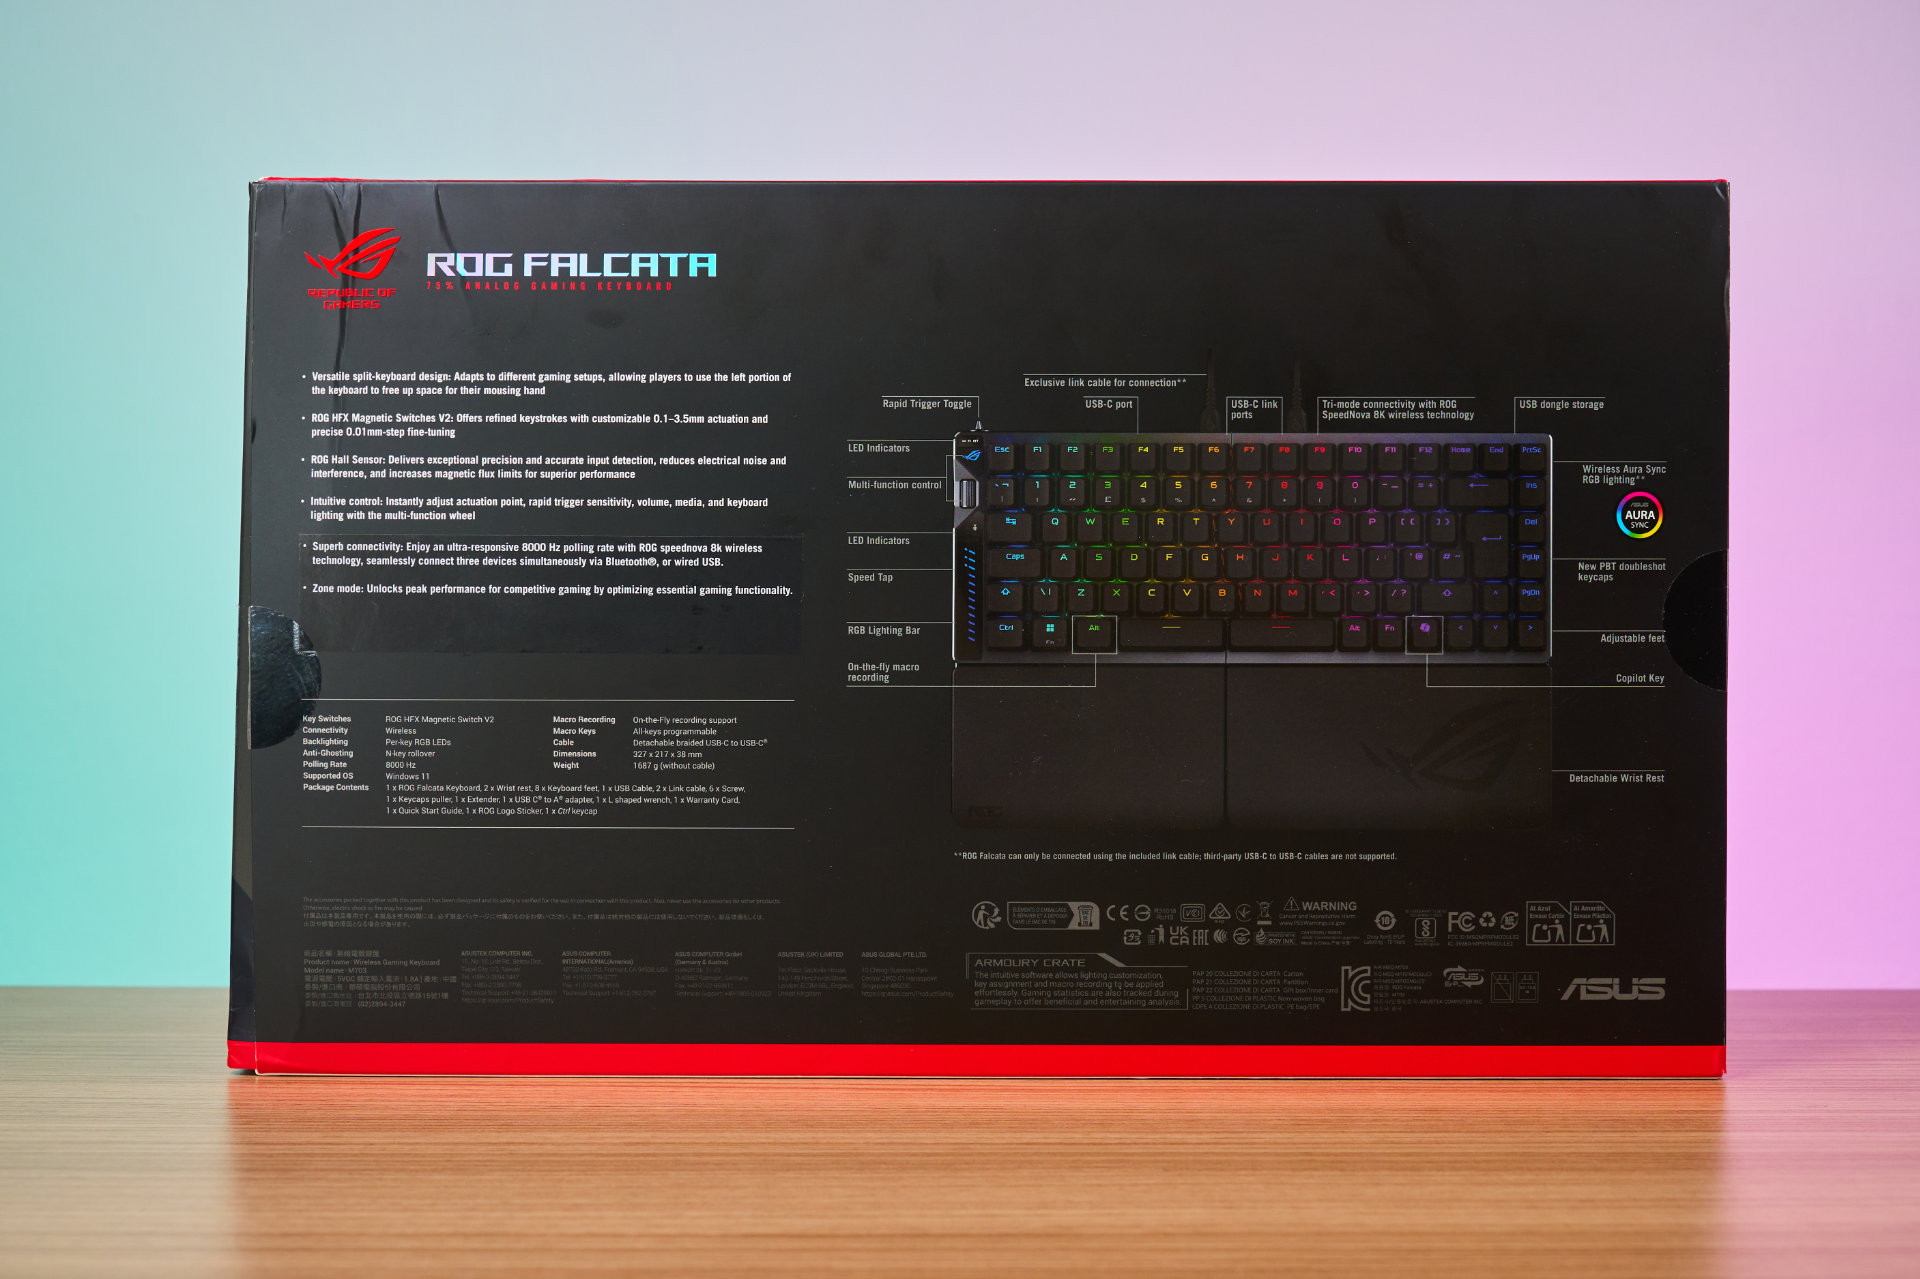
And to find out the exact one, just check the back of the box, as I also found out mine through the labelling, so props to them for listing it clearly.

Meanwhile, the stabilizers are well-tuned close to perfection, as the manufacturing process in recent years has included pre-lubing the wires, so yeah, it is a standard now, and all keyboards SHOULD have pre-lubed stabs that only tick at worst, minimally. That’s not saying the Falcata’s ticking though – It’s smooth, not sluggish, and just generally fine.
As for modding, this guide will not be touching on this aspect, but I’d reckon that it would be difficult for a given user to just open up and start removing foams, inserting o-rings to turn it into a burger mount or something. And don’t forget, since there’s the fancy and powerful screen on the left, it’s probably far more dangerous and risky for the average Joe to dismantle.
If you really wanna have a ROG keyboard that is modding-friendly, perhaps check out the Azoth lineup, where they have 3 different models catering to that specific need.
Conclusion

After testing out the ROG Falcata for a week, I’d say that it does a pretty good job in catching the market’s attention for split keyboards while combining its expertise in producing quality gaming gear, in addition to adding loads of little yet convenient things – all of these is just the classic ROG formula of making sure its products are always top of the line, maybe sometimes overengineered, but as always, staying ahead of the competition.
As for its price, there’s very limited info in terms of how much it’s going for officially, with one source quoting US$419.99, which is ~RM1,776, thus making it potentially the 2nd highest priced gaming keyboard right below the ROG Azoth Extreme. Nevertheless, I think it will be about the same for Malaysia when it arrives here.
In any case, if you ask me whether it is worth getting the Falcata, I’d say if split keyboard design is a “must” for you and you don’t mind shelling out cash for an experience that is top notch and of premium quality, this thing can be your “be all, do all” keyboard for both work and gaming.
Pros
- 75% layout for the balance ratio of cutting down size vs. removing non-essential keys
- Split design allowing ergonomic hand placement
- Dedicated flick toggle for enabling Rapid Trigger
- Physical roller that adjusts a total of 6 different aspects of the keyboard
- Intuitive LED sidebar with vivid colors; 3 bars with extra dots indicating big increments in value adjustment
- GearLink website allows customization of the keyboard without installing a driver in the host machine
- Easy-to-access USB dongle on the back
- Virtually no delay difference between wired and wireless dongle connections through ROG SpeedNova 8K
Cons
- B key is on the left side; Y key is on the right side; Might need to readapt if you’re hitting those keys cross-side by default
- Length of the interlink cable is a bit too short; Longer length will allow wider placement angles of both hands
Rating